
How to Build a Crypto Mining Rig: Step-by-Step Guide
Category: Cryptocurrency
Start Mining Bitcoin and Altcoins with Your Own Rig
If you've landed here, you're likely a crypto enthusiast eager to dive deeper into the world of crypto mining or an investor wanting hands-on experience with building your own mining rig. You’ve realized that buying prebuilt rigs or using cloud mining services can be costly or limiting and want a clearer, straightforward way to construct your own setup affordably and efficiently. Whether you’re a beginner overwhelmed by technical jargon or someone familiar with cryptocurrency but new to mining hardware, this guide is tailored precisely for you. We’ll cut through the confusion, step-by-step, explaining everything from the essential components and selecting compatible parts to assembly, software installation, and optimizing your rig’s performance. Unlike dry technical manuals or vague tutorials, this post is designed to help you build confidence, avoid costly mistakes, and maximize returns while mining Bitcoin, Ethereum, or other altcoins. By the end, you’ll not only understand how to build your rig but also the practical considerations and maintenance needed to keep it running smoothly. If you’ve been searching for a comprehensive, user-friendly guide that balances technical depth with accessible language, you’re in the right place — let's get your mining journey started.
- Start Mining Bitcoin and Altcoins with Your Own Rig
- Understanding Crypto Mining: Basics and Types of Mining Rigs
- Choosing the Right Cryptocurrency to Mine
- Essential Components for a Mining Rig
- Selecting Compatible Hardware and Estimating Costs
- Building Your Mining Rig: Step-by-Step Assembly Instructions
- Step 1: Prepare Your Workspace and Tools
- Step 2: Install the CPU, RAM, and Storage on the Motherboard
- Step 3: Mount the Motherboard in Your Mining Frame or Case
- Step 4: Connect Power Supply Unit (PSU)
- Step 5: Install GPUs with Riser Cables
- Step 6: Connect Additional Components and Cooling Fans
- Step 7: Double-Check All Connections and Hardware Placement
- Step 8: Power On and Test Hardware Functionality
- Safe Hardware Handling Tips
- Installing and Setting Up Mining Software
- Optimizing Mining Performance and Energy Efficiency
- Monitoring, Maintenance, and Troubleshooting Your Crypto Mining Rig
- Calculating Profitability and When to Upgrade Your Mining Rig
- Legal and Safety Considerations in Crypto Mining
Understanding Crypto Mining: Basics and Types of Mining Rigs
Before diving into building your crypto mining rig, it’s essential to understand the fundamentals of cryptocurrency mining and the different types of mining hardware available. At its core, crypto mining is the process of validating transactions on a blockchain network by solving complex mathematical puzzles. This process, known as Proof of Work (PoW), ensures network security and integrity while simultaneously introducing new coins into circulation as a reward for miners’ computational effort.
What Is Proof of Work?
Proof of Work is a consensus mechanism that requires miners to compete in solving cryptographic puzzles. The first miner to solve the puzzle gets to add the next block to the blockchain and receives a reward in the form of cryptocurrency. This process consumes significant computing power and electricity, making efficient hardware crucial to profitable mining.
Types of Mining Rigs: ASIC vs. GPU
When building your mining rig, you’ll mainly encounter two types of hardware: ASIC (Application-Specific Integrated Circuit) miners and GPU (Graphics Processing Unit) rigs. Understanding the key differences between these can significantly influence your rig’s design and profitability.
- ASIC Mining Rigs
- Purpose-built for mining a specific cryptocurrency algorithm.
- Extremely efficient and powerful, offering the highest hash rates.
- Best suited for mining Bitcoin or other SHA-256 based coins.
-
Typically more expensive and less versatile, as they cannot mine other altcoins.
-
GPU Mining Rigs
- Utilize graphic cards to perform the mining calculations.
- More versatile, capable of mining a wide variety of cryptocurrencies, including Ethereum and many altcoins.
- Easier to upgrade and repurpose for other tasks like gaming or rendering.
- Generally consume more power and offer lower hash rates compared to specialized ASICs.
Choosing between ASICs and GPUs depends largely on your mining goals, budget, and which cryptocurrencies you aim to mine. GPUs offer flexibility and are ideal for beginners or those who want to experiment with different coins, while ASICs deliver maximum performance for established mining operations focused on Bitcoin or similar coins. Understanding these basics will help you make informed decisions as you move forward with your mining rig build.

Image courtesy of Leeloo The First
Choosing the Right Cryptocurrency to Mine
Selecting the best cryptocurrency to mine is a crucial step that directly impacts your mining rig’s profitability and long-term success. While Bitcoin often grabs the headlines, mining it requires specialized ASIC hardware due to its high network difficulty and intense competition. Ethereum, until its recent shift to Proof of Stake, was the prime choice for GPU miners because of its efficient mining algorithm. Nowadays, many altcoins offer compelling mining opportunities thanks to various factors like lower difficulty, unique algorithms, and active communities.
Key Factors to Consider When Choosing a Coin
- Coin Profitability
-
Profitability depends on the current coin price, block reward, and mining difficulty. Use profitability calculators like WhatToMine to get real-time estimates based on your hardware specs and electricity costs.
-
Mining Algorithms
-
Different coins use different mining algorithms. For example, Bitcoin uses SHA-256, Ethereum used Ethash, and many altcoins utilize algorithms like Scrypt, Equihash, or RandomX. Your rig’s compatibility with these algorithms is essential since ASICs are algorithm-specific, while GPUs offer more versatility.
-
Network Difficulty and Hash Rate
-
The network difficulty adapts based on the total computational power. A rising difficulty means more competition and potentially lower rewards. Monitoring difficulty trends helps anticipate changes in mining returns, especially for volatile coins.
-
Community Support and Development
- A strong, active community ensures continued development, timely updates, and potential price growth. Mining a coin with robust developer support reduces the risk of sudden protocol changes that could render your hardware obsolete or less efficient.
Bitcoin, Ethereum, and Altcoins: A Comparative Overview
| Cryptocurrency | Mining Hardware | Algorithm | Difficulty Level | Community & Ecosystem |
|---|---|---|---|---|
| Bitcoin (BTC) | ASIC | SHA-256 | Very High | Largest, most established |
| Ethereum (ETH) | GPU* (now PoS transition) | Ethash (previously) | High | Large and developer-rich |
| Altcoins (e.g., Litecoin, Ravencoin) | GPU/ASIC (varies) | Scrypt, KawPow, etc. | Moderate to Low | Growing, diverse |
* Ethereum has moved to Proof of Stake (PoS), so mining is no longer viable, making other GPU-mineable altcoins attractive alternatives.
In summary, deciding whether to mine Bitcoin, Ethereum (historically), or an altcoin depends on your hardware type, electricity costs, and willingness to engage with evolving ecosystems. For ASIC miners, Bitcoin or SHA-256 based coins remain top choices due to efficiency gains, while GPU miners often benefit from targeting altcoins with lower difficulty and promising potential. Aligning your mining strategy with these factors will help you maximize returns and build a sustainable mining operation.

Image courtesy of Daniel Dan
Essential Components for a Mining Rig
Building an efficient and profitable crypto mining rig starts with selecting the right components tailored to your mining goals. Each part plays a critical role in ensuring your rig operates smoothly, delivers maximum hash rates, and stays stable over long periods. Whether you’re assembling a GPU-based rig or integrating ASIC units, understanding and choosing the essential hardware components will set the foundation for success.
1. Graphics Processing Units (GPUs)
GPUs are the heart of most mining rigs, especially for altcoins. Their parallel processing power makes them ideal for hashing algorithms like Ethash, KawPow, or Equihash. The number and quality of GPUs directly impact mining performance:
- Type & Model: Popular mining GPUs include NVIDIA’s RTX 3060 Ti, 3070, 3080, and AMD’s Radeon RX 5700 XT or RX 6800. Higher VRAM (8GB+) supports mining newer algorithms and DAG sizes.
- Quantity: Mining rigs typically house between 4 to 12 GPUs, depending on the motherboard and frame capacity.
- Efficiency: Energy-efficient GPUs reduce power costs and heat output, boosting overall profitability.
2. Motherboard
Your motherboard must support multiple GPUs and have enough PCIe slots to connect them. Key features include:
- PCIe Slots: Ensure there are sufficient full or x1 PCIe slots for your GPUs.
- Compatibility: Compatible with your chosen CPU and RAM.
- Mining-Specific Boards: Some motherboards are designed specifically for mining, featuring multiple slots and optimized BIOS settings.
3. Central Processing Unit (CPU)
Mining rigs rarely require powerful CPUs since mining tasks primarily rely on GPU power. A modest CPU that supports the motherboard and mining software is sufficient:
- Cost-Effective Choices: Intel Pentium or AMD Athlon processors are commonly used.
- Low Power Consumption: Opt for CPUs with lower TDP to conserve energy.
4. Power Supply Unit (PSU)
Choosing a reliable and efficient PSU is vital for stable power delivery and safety:
- Capacity: Calculate the total power consumption of all GPUs and components, then add a 20-30% headroom. For example, a rig with six 250W GPUs should have at least a 1600W PSU.
- Efficiency Rating: Look for 80+ Gold or Platinum certified PSUs for better energy efficiency.
- Dual PSU Setup: In large rigs, sometimes dual PSUs are used to distribute load evenly.
5. Memory (RAM)
While mining does not demand high RAM capacity, having enough memory ensures smooth operation of mining software and the operating system:
- Size: Typically, 4GB to 8GB of DDR4 RAM is adequate.
- Speed: Moderate speed RAM (2133MHz–3200MHz) suffices.
6. Storage
Basic storage is necessary to load your OS, mining software, and blockchain data:
- Type: SSDs (Solid State Drives) are recommended for faster boot and load times.
- Capacity: 120GB to 256GB drives are usually sufficient.
7. Frame and Rig Case
A sturdy frame keeps your components organized and maximizes airflow:
- Design: Open-air frames promote cooling and ease of maintenance.
- Material: Aluminum or steel frames balance durability and weight.
- Size: Ensure compatibility with the number of GPUs and other hardware.
8. Cooling System
Effective cooling prevents overheating, prolongs hardware life, and maintains performance:
- Fans: Use high-quality, high-CFM fans positioned for optimal airflow.
- GPU Cooling: Most GPUs have built-in fans, but additional case fans or external cooling may be necessary in hot climates.
- Advanced Cooling: Some miners employ liquid cooling or immersion cooling for extreme setups but these are more complex and costly.
By carefully selecting each of these components, you’ll build a mining rig capable of delivering high hash rates while maintaining energy efficiency and system stability. Investing in quality hardware not only improves mining returns but also minimizes downtime and maintenance issues. Next, we will explore step-by-step assembly and configuration to bring your mining rig to life.

Image courtesy of Andrey Matveev
Selecting Compatible Hardware and Estimating Costs
One of the most critical steps in building a successful crypto mining rig is ensuring hardware compatibility among components and accurately estimating your overall budget. Mining rigs require a harmonious blend of GPUs, motherboard, PSU, and other parts to function efficiently. Overlooking compatibility can lead to unstable systems, wasted investments, or underperformance, while ignoring cost factors can severely impact your profitability.
Ensuring Component Compatibility
When selecting your mining rig parts, it’s essential to confirm that each component works well together:
- Motherboard and GPU Compatibility:
- Verify the number of PCIe slots on the motherboard matches or exceeds your planned GPU count.
- Check that the motherboard BIOS supports multiple GPUs and that it supports riser cables if you plan to space GPUs away from the board for cooling.
- Power Supply Requirements:
- Calculate the total wattage of GPUs and other components, then select a PSU with ample headroom (20-30%) to handle peak power draws.
- Ensure the PSU has enough connectors (6-pin, 8-pin PCIe) for all GPUs.
- CPU and RAM Compatibility:
- Confirm the CPU socket matches the motherboard.
- Choose RAM compatible with your motherboard’s supported speeds and capacity limits.
- Chassis and Cooling Fit:
- Make sure your frame or case can physically fit your GPUs, PSU, and cooling solutions with adequate airflow space.
- Plan for additional fans or cooling methods compatible with your rig size and environment.
Avoid mixing outdated or incompatible components to prevent bottlenecks that reduce hash rates or cause hardware failures.
Budgeting Your Mining Rig Build: Investment Levels and Cost Estimates
Mining rig costs vary widely depending on the scale, hardware choices, and your mining goals. Here’s a rough breakdown tailored to different investment levels:
| Investment Level | Components | Estimated Cost Range | Notes |
|---|---|---|---|
| Entry-Level | 4 GPUs (mid-range), basic motherboard, 600-750W PSU, 4GB RAM, 120GB SSD | $1,200 – $2,000 | Suitable for beginners or hobbyists mining altcoins with GPU rigs. |
| Mid-Tier | 6–8 GPUs (high-performance), mining-specific motherboard, 1200W+ PSU, 8GB RAM, 240GB SSD | $3,000 – $5,000 | Balances power and cost, ideal for semi-professional miners targeting altcoins or dual mining. |
| Professional | 10+ GPUs or multiple ASIC units, high-grade PSU(s), professional frame, advanced cooling | $6,000+ | Designed for serious mining operations with focus on efficiency and long-term profitability. |
Additional Cost Factors:
- Electricity costs significantly affect ROI; efficient hardware pays off in energy savings.
- Shipping and import taxes can add to upfront costs, especially when sourcing components internationally.
- Accessories such as riser cables, additional cooling fans, and quality thermal paste should be included in budgeting.
By carefully balancing component compatibility with your available budget and mining ambitions, you can build a customized crypto mining rig optimized for your specific needs. Smart budgeting coupled with informed hardware choices will help you maximize hash power, maintain system stability, and improve profitability. Next, we’ll guide you through the precise steps to assemble and configure your mining rig for optimal operation.

Image courtesy of Leeloo The First
Building Your Mining Rig: Step-by-Step Assembly Instructions
Now that you’ve gathered all the necessary components and ensured compatibility, it’s time to build your crypto mining rig. Proper assembly and safe hardware handling are essential to maximize performance, extend component lifespan, and prevent costly mistakes. Follow this detailed step-by-step guide to assemble your mining rig efficiently and safely.
Step 1: Prepare Your Workspace and Tools
- Choose a clean, static-free environment with ample lighting and ventilation.
- Gather essential tools: a screwdriver (preferably magnetic), anti-static wrist strap, zip ties or Velcro straps for cable management, and thermal paste if needed.
- Wear an anti-static wrist strap to prevent electrostatic discharge (ESD) that can damage hardware.
Step 2: Install the CPU, RAM, and Storage on the Motherboard
- Carefully position the motherboard on a non-conductive surface.
- Insert the CPU into the socket following the motherboard manual—ensure proper alignment of pins.
- Install the RAM modules into the appropriate slots, applying firm, even pressure until they click into place.
- Mount the SSD or storage device using the motherboard or case mounting points and connect via SATA or M.2 interface.
Step 3: Mount the Motherboard in Your Mining Frame or Case
- Secure the motherboard to the frame or case using appropriate screws to avoid movement.
- Ensure airflow is unobstructed around the motherboard area to help with cooling.
Step 4: Connect Power Supply Unit (PSU)
- Position the PSU firmly inside the frame or case.
- Connect the 24-pin ATX power cable and CPU power connector from the PSU to the motherboard.
- Ensure the PSU is switched off during this step to avoid electrical hazards.
Step 5: Install GPUs with Riser Cables
- Attach PCIe riser cables to the motherboard PCIe slots; these create space for GPUs and improve airflow.
- Secure each GPU to the frame using screws or brackets, ensuring they fit snugly and with room for cooling.
- Connect the riser cable to each GPU.
- Attach PCIe power connectors from the PSU directly to each GPU, making sure connectors are firmly seated.
Step 6: Connect Additional Components and Cooling Fans
- Connect case fans or external cooling units to the motherboard or PSU to maintain optimal temperature.
- Organize cables neatly using zip ties or Velcro straps to prevent obstruction and promote airflow.
Step 7: Double-Check All Connections and Hardware Placement
- Inspect all cables and hardware to confirm proper installation and secure connections.
- Ensure there are no loose screws or misplaced components that could cause shorts or failures.
Step 8: Power On and Test Hardware Functionality
- Flip the PSU power switch on and press the motherboard power button to boot the rig.
- Enter BIOS to confirm the motherboard detects all GPUs, RAM, and storage devices.
- Adjust BIOS settings if needed, such as enabling 4G decoding and setting PCIe slots to GEN2 or GEN3.
Safe Hardware Handling Tips
- Always ground yourself before touching any component to avoid ESD damage.
- Avoid applying excessive force when inserting hardware—components should fit smoothly.
- Keep liquids and food away from your workspace to prevent spills and corrosion.
- Regularly clean fans and dust filters to maintain efficient cooling.
By carefully assembling your mining rig and following best practices for hardware safety, you set the foundation for stable mining operations and long-term component reliability. The next step will cover configuring mining software and optimizing your rig to start earning cryptocurrency effectively.

Image courtesy of Mikhail Nilov
Installing and Setting Up Mining Software
With your mining rig fully assembled and powered on, the next critical step is to install and configure the mining software that will turn hardware power into crypto rewards. The right mining operating system (OS) and software optimize your rig’s performance, stability, and ease of management. Additionally, proper driver setup ensures your GPUs or ASICs function at peak efficiency while minimizing compatibility issues.
Choosing a Mining Operating System
Several mining-specific operating systems streamline rig management and maximize hash power right out of the box:
- Hive OS: A popular Linux-based OS tailored for mining rigs. It supports a wide range of GPUs and ASIC miners, offers a user-friendly web dashboard for remote monitoring, and enables easy overclocking and troubleshooting.
- RaveOS: Another Linux-based solution designed for managing multiple rigs. Its intuitive interface aids in configuring mining pools, monitoring rig health, and automating software updates.
- SimpleMining OS (SMOS): Focused on simplicity, SMOS is beginner-friendly, lets you start mining quickly, and supports most GPUs with automatic driver installations.
- Windows 10/11: Still widely used, especially by miners who want more control or to run established Windows mining software. However, managing multiple rigs and updates can be more time-consuming compared to dedicated mining OS options.
Choosing a mining OS depends on your experience level, the number of rigs, and preference for GUI-based vs. command-line interfaces. Linux-based mining OSes typically offer better resource efficiency and remote management capabilities.
Installing GPU Drivers
Correct and up-to-date GPU drivers are essential for efficient mining, preventing crashes, and achieving optimal hash rates. Here’s how to set up drivers properly:
- Identify GPU Models: Confirm your GPUs’ exact model numbers — NVIDIA and AMD require different drivers.
- Download Official Drivers: Visit the official NVIDIA or AMD websites to download the latest drivers compatible with your chosen OS.
- Clean Previous Drivers: If you are upgrading or reinstalling, use tools like Display Driver Uninstaller (DDU) to remove old drivers cleanly, avoiding conflicts.
- Install Drivers: Follow the installation instructions carefully. On Linux OSes such as Hive OS, drivers often auto-install or can be installed via command-line scripts.
- Verify Installation: Use system tools to check your GPUs are recognized, drivers are active, and temperatures and clock speeds are within expected ranges.
Popular Mining Software and Configuration
Depending on which coins you plan to mine and your hardware, select mining software that best supports your setup. Here are a few widely trusted miners and their highlights:
- NiceHash Miner: Great for beginners; it automatically selects the most profitable coin and algorithm based on your hardware, simplifying setup and mining. Compatible with both ASICs and GPUs.
- Claymore Miner: Renowned for Ethereum mining (before PoS transition) and dual-mining capabilities (e.g., Ethereum + Decred). Supports AMD and NVIDIA GPUs with comprehensive tuning options.
- PhoenixMiner: A high-performance Ethereum mining software favored for its stability and low developer fees. It supports Windows and Linux and allows detailed control over GPU parameters.
- GMiner: Known for supporting multiple algorithms beyond Ethereum, including Ravencoin and Beam, with competitive speed and stability on NVIDIA GPUs.
- Braiins OS (for ASICs): An open-source firmware enhancing ASIC performance with better energy efficiency and custom configuration.
Basic Mining Software Setup Steps
- Download and Extract: Get the latest stable release of your chosen miner from official sources.
- Configure Mining Pool Settings: Edit configuration files or batch scripts to specify your mining pool URL, wallet address, and worker name.
- Adjust GPU Parameters: Optimize hash rates and power consumption by setting core clock, memory clock, fan speed, and power limits based on your hardware.
- Run the Miner: Start the mining software and monitor console outputs for accepted shares, GPU temperatures, and hash rates.
- Automate Startup: Configure your OS or mining OS dashboard to auto-launch the miner on boot for uninterrupted mining.
Tips for Smooth Software Operation
- Regularly update mining software to benefit from performance improvements and security patches.
- Use remote monitoring tools provided by Hive OS or NiceHash to keep tabs on rig status from anywhere.
- Test overclock and undervolting settings carefully to find the balance between performance and hardware longevity.
- Join mining communities and forums to stay informed about the latest software tweaks, pool optimizations, and troubleshooting advice.
By carefully installing your mining OS, GPU drivers, and selecting the right mining software, you lay a solid foundation for a high-performance mining rig that’s both stable and profitable. The combination of optimized hardware and software directly translates into improved hash rates and maximized cryptocurrency earnings.

Image courtesy of Leeloo The First
Optimizing Mining Performance and Energy Efficiency
Maximizing your mining rig’s hash rate while minimizing power consumption is crucial for achieving long-term profitability and sustainable operation. By fine-tuning GPU settings through overclocking and undervolting, managing thermal conditions effectively, and balancing performance with energy efficiency, you can significantly boost your mining throughput without pushing hardware beyond safe operational limits.
GPU Overclocking and Undervolting: Striking the Perfect Balance
Overclocking increases your GPUs’ core and memory clock speeds, directly enhancing the number of hashes computed per second. However, higher clock speeds typically translate into increased power draw and heat generation, which can reduce hardware lifespan if not managed carefully. Conversely, undervolting lowers the voltage supplied to the GPU, reducing power consumption and temperatures without severely impacting performance—often boosting stability during extended mining sessions.
Key tips for effective GPU tuning include:
- Incremental Adjustments: Make small, gradual changes to core clock, memory clock, and voltage settings, testing stability and hash rates at each step.
- Testing Stability: Use mining benchmarks and stress-testing tools to confirm your rig runs stable without crashes or rejected shares.
- Power Limit Tweaks: Set the power limit to a percentage lower than stock (e.g., 70-85%) to reduce energy use while maintaining near-maximum hash rates.
- Profile Saving: Save optimized profiles in your mining OS or software for easy load-on-start and consistent performance.
Advanced Thermal Management for Enhanced Efficiency
Effective thermal management is vital to prevent thermal throttling, which happens when GPUs reduce clock speeds to avoid overheating, causing hash rates to drop. To maintain peak mining efficiency:
- Optimize Airflow: Position case and exhaust fans to create consistent airflow paths across GPUs, removing heat efficiently.
- Clean Components Regularly: Dust buildup impedes cooling and can cause temperature spikes; routinely clean fans and heatsinks.
- Use Quality Thermal Paste: Replacing stock thermal paste with high-performance alternatives improves heat transfer from GPU chips to cooling solutions.
- Monitor Temperatures: Employ mining OS dashboards or system utilities to track GPU temps, aiming to keep them generally below 70-75°C for longevity.
- Adjust Fan Curves: Program fan speeds to ramp up as temperatures rise, balancing noise levels with cooling requirements.
Maximizing Hash Rates While Minimizing Power Costs
Mining profitability depends heavily on the delicate balance between hash rate and energy expenditure. To maximize your returns:
- Select GPUs known for high hash-to-watt ratios, such as the NVIDIA RTX 3060 Ti or AMD RX 5700 XT.
- Leverage undervolting combined with overclocking on memory speeds—the most significant factor influencing mining algorithms like Ethash.
- Utilize mining software’s built-in optimizations and custom command-line parameters to fine-tune workload distribution.
- Choose mining pools with low fees and reliable payouts to keep more earnings on each mined block.
By employing these optimization strategies—smart overclocking, rigorous undervolting, thoughtful cooling, and power-conscious configurations—you ensure your mining rig operates at peak efficiency. This not only extends the lifespan of your investment but also maximizes your return on electricity expenditure, which is critical given the energy-intensive nature of cryptocurrency mining.
Image courtesy of Andrey Matveev
Monitoring, Maintenance, and Troubleshooting Your Crypto Mining Rig
After successfully building and optimizing your crypto mining rig, maintaining its health and performance through continuous monitoring, routine maintenance, and prompt troubleshooting is essential to ensure consistent mining rewards and prolong hardware lifespan. Neglecting these areas can lead to decreased hash rates, frequent crashes, or hardware failure, all of which impact your mining profitability.
Remote Monitoring of Rig Health and Performance
Staying updated on your mining rig’s operational status, especially if you manage multiple rigs or run them remotely, is critical. Use dedicated mining OS platforms like Hive OS, RaveOS, or remote management tools such as NiceHash Remote, which provide real-time dashboards displaying:
- Hash rates per GPU or ASIC to detect performance drops early.
- GPU temperatures and fan speeds to avoid overheating.
- Power consumption and efficiency metrics to monitor energy use.
- Accepted and rejected shares, indicating mining success or network issues.
- System uptime and error logs to identify and address instability quickly.
Enabling notifications via email or mobile apps helps you respond promptly to alarms like temperature spikes, hardware disconnects, or software crashes, reducing downtime and maximizing mining time.
Routine Cleaning and Preventive Maintenance
Dust and debris accumulation can severely hinder cooling efficiency and cause overheating. Establish a regular cleaning schedule, ideally every few weeks, that includes:
- Powering down and unplugging the rig before cleaning.
- Using compressed air or soft brushes to remove dust from GPU fans, heatsinks, PSU units, and motherboard areas.
- Checking and tightening loose cables or connectors.
- Inspecting thermal paste and replacing it every year or when temperatures rise unexpectedly.
- Cleaning the mining frame and ensuring unobstructed airflow paths.
Keeping fans and cooling components dust-free maintains stable temperatures, preventing thermal throttling and hardware degradation.
Common Issues and How to Troubleshoot
Even the best-built mining rigs can face occasional issues. Being familiar with typical symptoms and fixes helps minimize disruptive downtime:
- Hash Rate Drops:
- Often caused by GPU throttling due to overheating or power limits. Lower clock speeds or adjust undervolting settings and ensure clean cooling systems.
-
Check for software updates or driver conflicts that might reduce efficiency.
-
System Crashes or Restarts:
- Could stem from insufficient power supply, overheating, or defective hardware. Verify PSU stability and GPU temperatures.
-
Test each GPU individually to identify faulty units.
-
Disconnected GPUs or Hardware Not Detected:
- Re-seat GPUs and riser cables securely. Inspect PCIe slots and cables for damage.
-
Update BIOS settings to ensure full PCIe functionality (e.g., enable 4G decoding).
-
Mining Software Failures or Errors:
- Keep mining software and drivers up to date.
- Review error logs and adjust configuration files, paying attention to pool URLs, wallet addresses, and worker names.
Updating Software and Firmware
Regular updates to mining OS, GPU drivers, and ASIC firmware can unlock performance improvements, fix bugs, and enhance security:
- Check official websites or mining community forums for new releases and changelogs.
- Use the mining OS dashboard or your rig’s management tools to apply software updates during non-peak mining hours.
- Backup configurations and wallet data before performing upgrades to avoid data loss.
- For ASIC miners, carefully apply firmware updates following manufacturer instructions to prevent bricking devices.
By actively monitoring your mining rig remotely, performing diligent maintenance, swiftly troubleshooting common problems, and keeping software up to date, you ensure your crypto mining operation remains robust, efficient, and profitable over time.
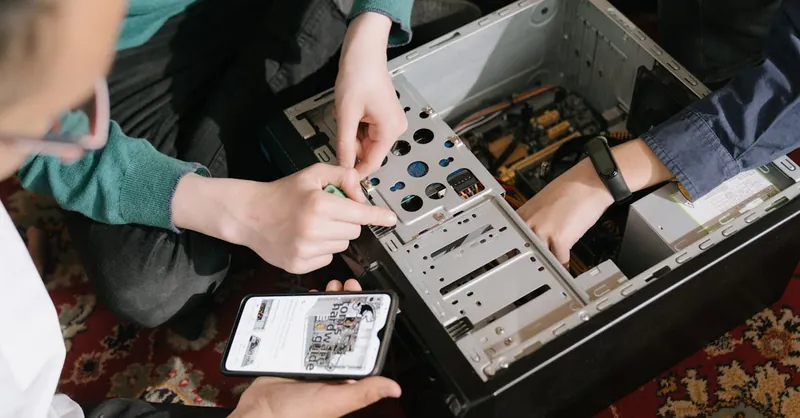
Image courtesy of cottonbro studio
Calculating Profitability and When to Upgrade Your Mining Rig
Before investing more into your mining rig or expanding your setup, it’s essential to calculate profitability accurately by weighing your electricity costs against potential mining earnings. Mining profitability depends heavily on your hardware’s hash rate, the current cryptocurrency market prices, mining pool fees, and most importantly, your electricity expenditure, which often represents the largest ongoing cost.
Using Profitability Calculators to Assess Earnings
Several online tools make it simple to evaluate if your mining operation is financially viable. Popular profitability calculators such as WhatToMine, CryptoCompare, and NiceHash Profitability Calculator allow you to input:
- Your rig’s total hash rate (measured in MH/s or TH/s depending on the coin)
- Power consumption (in watts)
- Electricity cost (per kilowatt-hour)
- Pool fees and hardware costs
These calculators then estimate your daily, monthly, and yearly earnings in fiat currency and cryptocurrency, providing an immediate snapshot of your net profits after electricity costs. Regularly checking these tools helps you stay informed about changes in mining rewards and network difficulty that impact returns.
Signs It’s Time to Upgrade or Replace Components
To maximize your mining ROI and maintain a competitive edge, recognize when system upgrades or component replacements are necessary. Key indicators include:
- Declining Hash Rate or Efficiency: If your GPUs or ASICs are producing fewer hashes despite stable operation, it may indicate hardware degradation or outdated models overshadowed by newer, more efficient tech.
- Rising Power Costs with Stagnant Output: Increasing electricity bills without corresponding gains in mining returns reduce profits. Upgrading to more energy-efficient GPUs or ASIC miners can significantly reduce power consumption.
- Frequent Hardware Failures or Instability: Persistent crashes, overheating despite cooling adjustments, or component malfunctions suggest it’s time for maintenance or replacement to avoid downtime.
- Obsolete Mining Algorithms or Protocol Changes: Cryptocurrencies regularly update their consensus algorithms or move to Proof of Stake, which may render specialized hardware ineffective. Staying current with coin development helps avoid stranded hardware.
- Better ROI with Newer Hardware: Advances in mining technology deliver improved hash rates per watt and lower operational costs. Comparing your rig’s performance to market standards can highlight opportunities to upgrade profitably.
Tips for Cost-Effective Upgrading
- Prioritize GPU or ASIC models offering enhanced energy efficiency to cut long-term electricity costs.
- Sell or repurpose old components to offset upgrade expenses.
- Consider gradual upgrades—replace a few GPUs at a time to spread costs and test performance improvements.
- Keep backup hardware ready to minimize downtime during component swaps or failures.
By continuously evaluating your mining rig’s profitability with reliable calculators and recognizing upgrade signals early, you ensure your mining operation remains both cost-effective and competitive. This proactive approach lets you capitalize on evolving technology and fluctuating market conditions for sustained crypto mining success.

Image courtesy of Leeloo The First
Legal and Safety Considerations in Crypto Mining
When building and operating your own crypto mining rig, ensuring legal compliance and maintaining strict safety protocols are paramount to protect yourself, your equipment, and your investment. Ignoring these critical aspects can lead to regulatory penalties, hazardous conditions, or costly damage due to electrical faults or overheating.
Electrical Safety Protocols
Mining rigs are power-hungry systems that place a continuous load on your electrical circuits. To safely manage electricity use:
- Use Proper Wiring and Outlets: Ensure your power outlets and wiring can support the combined wattage of your mining rig. Avoid overloading standard home outlets; dedicated circuits or industrial-grade wiring may be required.
- Install Surge Protectors and Circuit Breakers: Protect your hardware from voltage spikes and electrical faults by using high-quality surge protectors and circuit breakers rated for your setup.
- Avoid Daisy-Chaining Power Strips: Over-reliance on multiple power strips can increase fire risk and reduce power stability.
- Professional Electrical Inspection: Especially for larger rigs or multiple units, consult a certified electrician to verify that your electrical system meets safety standards.
Ventilation and Temperature Control
Mining equipment generates significant heat during operation, creating risks of hardware damage and fire hazards:
- Maintain Adequate Ventilation: Position your rig in a well-ventilated area with airflow that efficiently dissipates heat. Closed or poorly ventilated spaces can cause thermal throttling or component failure.
- Use Dedicated Cooling Solutions: Supplement GPU fans with external fans, exhaust systems, or even air conditioning if necessary to keep ambient temperatures within safe limits (generally below 30°C or 86°F).
- Monitor Temperatures Continuously: Employ software or hardware sensors to alert you to overheating conditions before damage occurs.
Noise Considerations
Mining rigs, especially GPU farms and ASIC units, can be quite loud due to multiple high-speed fans:
- Choose a Suitable Location: Set up your mining rig away from living spaces or bedrooms to minimize noise disturbance.
- Use Soundproofing or Enclosures: Specialized mining rigs may be housed in sound-insulated frames or rooms designed to reduce noise pollution.
- Plan for Long-Term Operation: Continuous noise can be disruptive for households or neighbors, so addressing this upfront maintains a safe and comfortable environment.
Compliance with Local Regulations
Mining cryptocurrency is subject to varying legal frameworks around the world, so it’s essential to:
- Understand Local Laws: Research the legality of crypto mining in your country, state, or municipality. Some areas restrict or ban mining due to its environmental impact or electricity consumption.
- Obtain Necessary Permits: In commercial-scale mining setups, permits related to electrical usage, business operation, and environmental compliance may be required.
- Report Income and Pay Taxes: Cryptocurrency mined is often considered taxable income. Maintain accurate records of mining rewards and consult a tax professional to comply with reporting obligations.
By proactively addressing these legal and safety considerations, you ensure your crypto mining rig operates reliably, sustainably, and within the bounds of the law. This solid foundation not only protects your hardware but also safeguards your investments and reputation as a responsible miner.

Image courtesy of cottonbro studio